Summary
Damage loadouts and rotations have always been key parts ofDestiny 2. Optimizing DPS loadouts and damage rotations is key if players want to kill raid bosses in one phase or simply top the damage charts on the final boss. Unfortunately, plenty of misconceptions exist about optimal DPS strategies within the community, with many players not understanding that specific weapons aren’t as good as they may appear.
Certain classes can do better damage than others, like theBanner of Warbuild on Titan. Different weapon types are more commonly used for boss damage, as some provide strong ‘total’ damage, and others specialize in burst damage. This article will provide the more common and generalized damage strategies the average player can employ in a raid or dungeon setting.
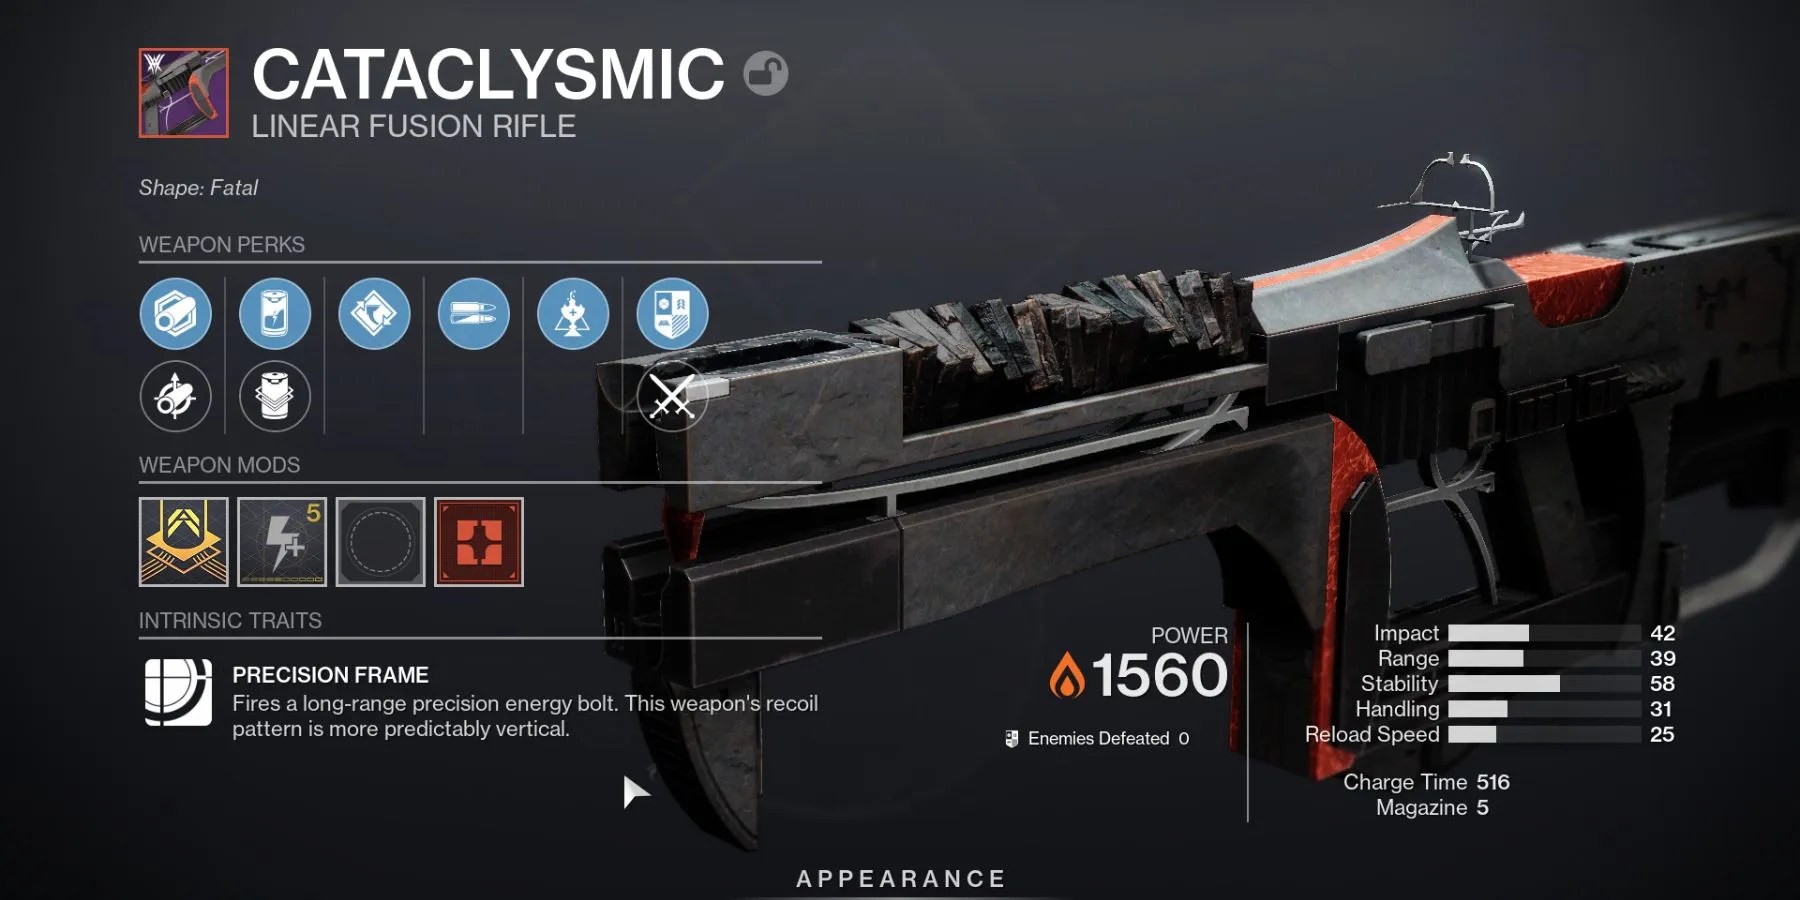
5WitherhoardBait And Switch Cataclysmic
Excellent Total Damage With High Ease Of Use
Arguably the most straightforward rotation to perform, combiningWitherhoardwith one of thestrongest Linear Fusion Riflesin the game, Cataclysmic, can yield excellent results. While this rotation might not have as much burst damage, it makes up for this in its ease of use and total damage thanks to how ammo-efficient Cataclysmic is, especially with Fourth Time’s The Charm. The main difficulty of this rotation is ensuring that every shot is a precision hit; if one goes wide, the damage falls quite a bit.
To perform this rotation, start by sticking the boss withWitherhoard. This will deal damage over time while firing Cataclysmic. Next, activate Bait and Switch by firing an energy weapon, and then move into firing with Cataclysmic. With Fourth Time’s The Charm and Bait and Switch, players can get off the perfect number of shots to line up with Bait and Switch’s timer, provided all shots are precision hits. Once the magazine is empty, reload it, swap toWitherhoard, and repeat the process.
4Izanagi’s BurdenBait And Switch Reconstruction
High Damage FromIzanagi’s BurdenMakes It An Optimal Swap Weapon
Thanks to its simplicity,Izanagi’s Burdenwith a Bait and Switch Rocket Launcher, likeApex Predator from the Last Wish Raid, is probably the most well-known DPS rotation. It can provide excellent damage against all bosses. A Special Grenade Launcher like Wilderflight can be included to improve the rotation further. However, this is a little more advanced and unnecessary in the average raid.
Players must load aHoned Edgex4 shot into Izanagi’s Burdeto perform this rotation. Once fired at the boss, reloadIzanagi’s Burden, re-activatingHoned Edgein the process. Next, Bait and Switch must be activated, so firing the weapon in the energy slot is needed, and then finally finish off with Apex Predator. Due to Reconstruction, Apex Predator will auto-reload, meaning players should return toIzanagi’s Burdenand repeat the cycle to allow Apex Predator to reload. If swaps are too fast, Reconstruction won’t have the time to activate.

3Cold Comfort Rocket Dump
A Specific Weapon Combo Yields Remarkable DPS
Cold Comfort is thehighest-DPS Rocket in the game, thanks to various factors. However, the main one is the Origin Trait ‘Restoration Ritual’. This trait loads an emergency reload upon emptying the magazine (which is very common on Rocket Launchers). To activate this, perform some finishers. This strategy gets even better if the Cold Comfort has Envious Assassin on it, as players can fire off around four Rockets back-to-back with everything working together.
This rotation is not necessarily a strategy, but instead, it involves spamming Cold Comfort shots at a boss until it dies. Cold Comfort will deal absurd amounts of burst damage when combined with a teammate usingGjallarhornand a debuff likeTractor Cannon.

2Lucky PantsCelestial NighthawkSwap
Combining Two Exotics For Immense Burst Damage
This is a very short DPS cycle but slightly more complex, allowing the user to deal millions of damages instantly. Of course, players can only equip one exotic at a time. Still, once Golden Gun has been cast withCelestial Nighthawkequipped, Hunters can swap toLucky Pantsto be prepared to take advantage of the insane burst damage of these exotic legs when paired with Warden’s Law orMalfeasance. These two exotics are some of Hunter’sstrongest exotic armor options,so when combined, they pack a serious punch.
This rotation is best paired with a supplementary damage option that can be used while theLucky Pants’Out of Luck' debuff runs down. Some weapon choices could be a Fusion Rifle in the energy slot, a Bait and Switch Rocket, or a Linear Fusion Rifle in the heavy slot to increase the damage.

1Envious Assassin Cataphract GL3 Bait And Switch
A Simple Yet Effective Rotation
One of the simplest rotations inDestiny 2, it earns this spot thanks to its ridiculous ease of use and accessibility. The hardest part about this rotation is obtaining the Cataphract GL3, which requires players to hop into Trials of Osiris. Alternatively, theKoraxis’s Distress from Root of Nightmarescan be used, but this can be harder to use as the damage perk of choice is Surrounded. Any weapon can activate Bait and Switch, but options likeIzanagi’s Burden,Witherhoard, or a Fusion Rifle will be best.
The most important part of this rotation is that the Grenade Launcher has Envious Assassin, as without this perk, the loadout becomes much weaker in terms of burst damage. To start, kill as many enemies before DPS as possible. This will load additional shots for Envious Assassin. Once the damage phase begins, activate Bait and Switch by firing every weapon in the loadout, finishing with the Grenade Launcher. Once active, dump the entire magazine of the Grenade Launcher, and then use the other weapons in the loadout to round out the damage phase.

